This is the final idents with audio together with my team mates, I am really happy with how this turned out, I feel like we stuck to the theme quite well, and I have made some adjustments to the idents I worked on, some minor changes such as flickering issues and some jumpy camera frames. There are definitley things i would change If i were to do them again, but I am happy overall and I dont think we could have done any better in the time we had.
Thursday, 18 May 2017
Applied Animation - All Idents Finished
This is the final idents with audio together with my team mates, I am really happy with how this turned out, I feel like we stuck to the theme quite well, and I have made some adjustments to the idents I worked on, some minor changes such as flickering issues and some jumpy camera frames. There are definitley things i would change If i were to do them again, but I am happy overall and I dont think we could have done any better in the time we had.
Applied Animation - Maya Animation
We had another study task to animate using the Maya timeline, which I quite enjoyed doing, however I ran into some problems using the graph editor, however I think it worked out ok in the end, as some of the technical problems were not my fault altogether.
1. Pendulum
This pendulum went quite well, however I had trouble getting the easing in and out down, due to the graph editor not working the same way everyone else's was, I am not sure why this was as it should have changed when I edited the graph, but it just didn't.
2. Bouncing balls
Only one of these balls was supposed to have squash and stretch, however it just didn't look right to me just having a static ball going up and down, so I decided to add squash and stretch to both of them anyway. I am happy with how these turned out because of the squash and stretch.
3. Articulated Pendulum
This is where things really went wrong with Maya, again, the animation graph editor just didn't work the same as my class mates did and therefore I was not able to get the correct follow through and secondary action that everyone else has.
Overall I am really happy with the animation in Maya, I think it clicked quite well with me, and I really enjoyed the ease of the key frames and what not.
Wednesday, 17 May 2017
Applied Animation - Maya Modelling
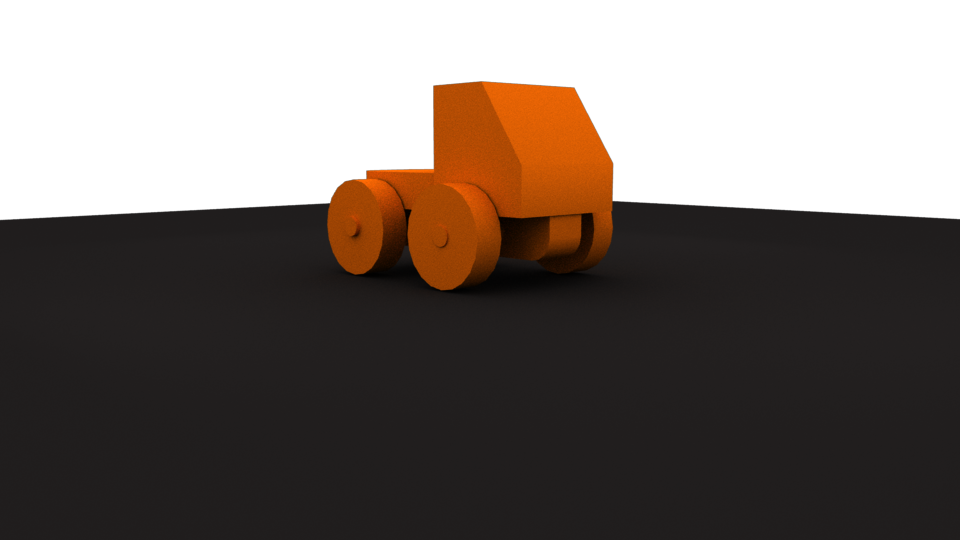
My first experience with 3D modelling was more positive than I expected, our first task was to model from a picture of a small wooden truck.


This was the result of my first 3D model, I did run in to some problems with this, because I had somehow managed to change the snapping point so that every time I moved something ever so slightly, it would fly off to the far ends of the screen. Other than that, it came pretty naturally to me and it didn't take long for me to come to terms with the controls and what not on Maya.


This was the result of my first 3D model, I did run in to some problems with this, because I had somehow managed to change the snapping point so that every time I moved something ever so slightly, it would fly off to the far ends of the screen. Other than that, it came pretty naturally to me and it didn't take long for me to come to terms with the controls and what not on Maya.
2nd Model - Batmobile
For my 2nd model, I decided to make the Batmobile from Batman the Animated Series, as I thought it would be a pretty simple model, and also I thought it would be a good step up from making the truck.
Honestly I am very happy with how this turned out, there are definitely some things wrong with it, and some things I would change when I become more proficient at using Maya, however I believe that it turned out really well as an interpretation, I like how the colours turned out, but I struggled to colour the wheels because of how I made them. I also decided to add active lights to the headlights just to make it a bit more dynamic. Originally I had very dynamic lighting on it, but when it was saved as png it became pitch black, and you couldn't see the model properly. I did also include an uncoloured screenshot just so that you can see the model more clearly. The one thing I did struggle with on this model was the back fins, they are supposed to be curved however I just couldn't get them to work so they are more jagged than I would of liked. I am happy with the wheels and general shape though, because I spent a long time getting it right, and I used the mirror tool to make sure both sides were completely identical.


Applied Animation - Finished Idents
I have now finished my idents, and I am pretty proud with how they turned out, I believe had I spent less time on pre production, I could have finished them to a better standard however I did my best with the time I had, and I have learned my lesson for the next group project I undertake.
1. Dinosaur Ident
This ident could be improved more so than the rest, the dinosaur was very hard to get right, and even now I am unhappy with it, I am hoping the sound effects will save it somewhat, because he just doesn't feel like a believable dinosaur. Although I am happy with the explosion and how that turned out.
2. Caveman Ident
This is definitely the ident I am most proud of, I like the caveman and his design, although my issue is with the hand, as the proportions are off, and I only properly looked when it was finished, which was stupid of me, and I was too busy splitting my attention between the other idents that I was not properly paying attention to small details like this which easily could have been avoided.
3. Mountain Ident
The mountain ident worked out a lot better than I expected it to honestly, but I am actually very proud of the camera movements and the 3d camera is really effective. The 3d camera definitely is effective at taking the focus off of the awful movement of the person climbing up.
Applied Animation - Character design

Applied Animation - Finished Shots
With one week left to go, I have some finished shots and a lot of work in progress shots, the walk cycle is now completely finished, and a lot of the mountain ident is done. There is not much left to work on, just a case of some minor parallaxing and some tweaks added to others.
Caveman shot 1
This is the first shot of the caveman ident, the sliding is somewhat hidden by the movement of the camera, and the glow on the fire I am very happy with, it makes it look quite real. I did this in adobe animate by making the fire layers a movie clip symbol, then adding gradient glow effects to them in a slightly darker colour. I am quite happy with how this turned out but there is definitely things I would do differently next time, and I would try a different program to make sure I could add hair and things to him.
Mountain Climber
I am quite unhappy with the mountain climber, his movement is so unrealistic, but I have no time to change it, because I spent so long on the caveman that I did not leave enough time to make the other 2 as detailed as they can be. I am hoping that when I add the parallax it will somewhat hide it as it will take the focus off of him and put it onto the logo.
Applied Animation - Finished Backgrounds
My team and I have worked very hard on matching texture brushes so that our backgrounds are very consistent, and I have worked very hard on using textures in my backgrounds, hence why animating is taking so long. However I have now finished every background I needed, meanwhile the caveman is almost finished and the mountain dude has been mapped out.
1. Caveman
The first background now has an outside view and is larger than it was in the walk cycle map, also some more textures have been added to the floor. The 2nd background was made very dark because it is the back of the cave.


2. Dinosaur
The 2nd background is now finished and consistent with the first one, which was done long before.


3. Mountain
The mountain background now has the logo lined up with the final logo reveal, so that there is no jumpy movements.

Appplied Animation - Progress
I have just been working solidly on my animations for the past week, and it would be fair to say, progress is slower than I would have liked, with the caveman walk cycle almost finished, the mountain key frames done, and some crude key frames of the dinosaur done. I definitely need to pick up the pace.
1. Caveman
With this one you can still see the blue underline, and the character on top. A noticeable difference is that the caveman does not have hair, this is because pressure sensitivity would not work on adobe animate on my surface pro, and I could not get the brush thin enough to make the hair look believable. The background attached is also a placeholder, and not the actual background that will be used. There is also no camera movements yet as the walk cycle needs to be finished first.
2. Dinosaur
This is more of an animated animatic, cut together with my storyboard, it has very crude key frames next over one of the final backgrounds for this one.
3. Mountain
This one has also very crude mountain effects, which need a lot of work, and timed out key frames for the guy climbing up, I am unhappy with the placement of the logo so I am going to rework the backgrounds so that when the logo fades in, it is lined up with the faded in logo.
Applied Animation - Rotoscoping
I decided that it would be a good idea to rotoscope my caveman, this was to make the movement more realistic, and make sure he moves in the way I want to, and it would take me too long to map out myself for the movement.
This is the video I took, using my team mate as a reference, he used a bottle as a replacement for the caveman's torch in his hand, so that I could get the hand placement down on the actual video.
This is the rotoscope I took of the reference video, obviously I changed some stuff with it, and he is a little slidey because I have made the video move and bigger in areas. This is only the outline, and I am going to draw over this with the actual caveman. I am however quite happy with how this turned out, it could be better and there is things I would change, however I have 2 more Idents to do after this one, so I need to get a move on and keep on animating as it is for now, and make any tweaks after they are all done. I will also try and make it better using camera movements.
Applied Animation - Storyboard Changes
After the decision of myself and my group, I reworked 2 of my storyboards to make sure that they fit with the style of the shots in the group, so that there is not too many cuts, and they can be slow moving like the rest of the group.
1. Caveman
The changes made to this one take more time on specific shots, and it has stage directions on them to make sure it is more obvious what the camera will do.


1. Caveman
The changes made to this one take more time on specific shots, and it has stage directions on them to make sure it is more obvious what the camera will do.

2. Dinosaur
The changes made to this one were pretty drastic, as I changed the design of the dinosaur to be more like the initial sketch of another one of my team mates, this was to make it slower and easier to animate, also to take more time over shots so I don't have to have so many cuts and the audience can have time to see the shots and take in what they are seeing before the logo appears on screen. I much prefer this design as it will make it a lot easier for me to animate.

Applied Animation - Animatics
These are my first animatic made from my storyboards, they exist purely for the case of getting the timing down, however, my team and I have decided that there needs to be changes to the caveman and the dinosaur, to make it less shots, and easier to animate, this will keep consistent with the other idents and storyboards that my team mates have done. These animatic's are very crude because I am the only one in the group who favours hand drawing storyboards and not animating them digitally.
1. Caveman
2. Dinosaur
3. Mountain
Applied Animation - Storyboards
These are my first storyboards for my 3 idents for the national geographic I am quite happy with how these turned out, but I will make sure my team are also happy with them before I start production on them.
1. Caveman
With this one I wanted to play around with lighting and realistic looking backgrounds, therefore I have made the shadowed areas clear in this storyboard so that I can convey this to my team and also the viewer,

This animatic doesn't use much lighting effects, instead, it focuses on the dinosaur walking on to the screen, I am concerned with how the dinosaur will move, as I already planned to rotoscope the caveman to make the movement realistic.

3. Mountain
This one has a lot of parallaxing movement which I plan to do in after effects with the 3d camera, I really want size to be obvious in this, and the movement of clouds to set the scene.

Applied Animation - Proof of Concept
These are the 9 Ideas that I drew out for my groups ideas, just to gain a good grasp of what needs to be done with the idents and where we can take them. Also if we need to change up any ideas that we feel don't work.
There is a running theme of going through time in a sense, these are subject to change, and this is just my interpretation of what they will look like, they are not in any way the final version of what they will be. We thought it best to do this, as although we came up with the ideas together, it is important for us to visualise our ideas separately and then bring them together, so as to better communicate what we thought the idea would be visually. It is interesting that some of the ideas are quite different to each others, and some of them were almost exactly the same.
1. Caveman

2. Dinosaur

3. Under the Sea

4. Jungle

5. WW1 Spitfire

6. Mountain

7. Excavator

8. City

9. Space

There is a running theme of going through time in a sense, these are subject to change, and this is just my interpretation of what they will look like, they are not in any way the final version of what they will be. We thought it best to do this, as although we came up with the ideas together, it is important for us to visualise our ideas separately and then bring them together, so as to better communicate what we thought the idea would be visually. It is interesting that some of the ideas are quite different to each others, and some of them were almost exactly the same.

2. Dinosaur

3. Under the Sea

4. Jungle


6. Mountain

7. Excavator

8. City

9. Space

Applied Animation - Brief and Ideas
Starting a new brief today, this time it being group work, I am working with 2 other people on the "National Geographic Ident" task, where we make a set of 9 Idents based around the channel National Geographic. Our first stage was to research into National Geographic itself, to look at older idents, and a few general themes which we could generate ideas from.
From our research we found that the channel tends to be very general towards history, environmental stuff, and technology, really there is no 1 theme which we could go off of, all we know is that we have to display the given logo on screen for 3 seconds.
 This is the logo we need to display for 3 seconds on screen, in a 10 second ident, in a series of 9. Just from looking into previous idents, we realised we could make any number of themes.

This is our first idea generating sheet, where we listed down a lot of ideas, which we thought we could work into our idents. After doing this, we put our first initial down next to 4 ideas that we wanted to take care of, and then we could narrow it down to 3. The 4 I chose, were very character based because I wanted to focus more on character animation. The 4 I wanted, was a caveman painting the national geographic logo, a mountain climber, a traveller walking through history, and a dinosaur interacting with the logo. Our next step, is to go away and draw our own interpretations of the 9 that were chosen so we can bring all our ideas together and then decide on the best course of action.
From our research we found that the channel tends to be very general towards history, environmental stuff, and technology, really there is no 1 theme which we could go off of, all we know is that we have to display the given logo on screen for 3 seconds.


This is our first idea generating sheet, where we listed down a lot of ideas, which we thought we could work into our idents. After doing this, we put our first initial down next to 4 ideas that we wanted to take care of, and then we could narrow it down to 3. The 4 I chose, were very character based because I wanted to focus more on character animation. The 4 I wanted, was a caveman painting the national geographic logo, a mountain climber, a traveller walking through history, and a dinosaur interacting with the logo. Our next step, is to go away and draw our own interpretations of the 9 that were chosen so we can bring all our ideas together and then decide on the best course of action.
Subscribe to:
Comments (Atom)